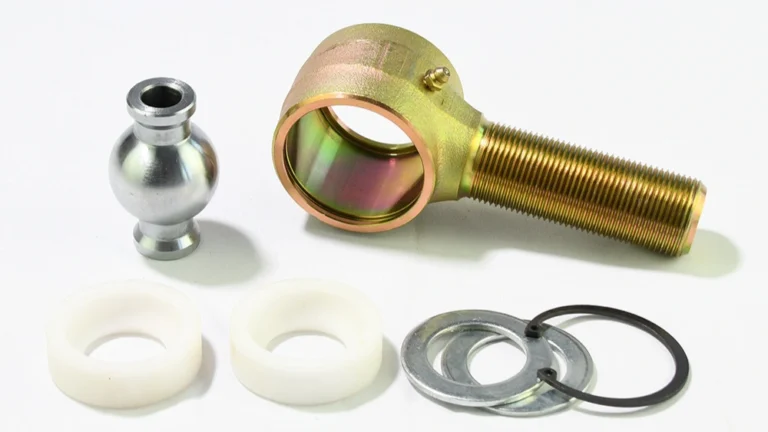
A Johnny Joint is an essential component for off-road vehicles, known for enhancing performance by improving suspension flexibility, wheel articulation, and overall handling. Whether you’re tackling rugged trails, climbing sand dunes, or navigating rocky paths, a well-functioning Johnny Joint helps ensure a smoother and more controlled ride.
If your off-road vehicle often undergoes aggressive off-road driving, it might not take long before your Johnny Joint needs a rebuild—especially if you start noticing the ball easily rotating or hear strange noises coming from the suspension system.
A Johnny Joint rebuild kit typically costs between $20 to $60. However, if you take it to a shop for a rebuild, labor costs can run up to $100 per hour. When you add up the cost for an entire vehicle, it can become quite expensive. So why not try rebuilding it yourself at home and save some money?
Tools for Rebuilding a Johnny Joint
Before you dive into the rebuild process, it’s important to gather the right tools. Don’t worry; you don’t need a whole workshop to get the job done, just a few key pieces of equipment. Here’s what you’ll need to get started:
- A bench vise
- A wrench
- Snap ring pliers
- A new Johnny Joint Kit
- A Johnny Joint Assembly/Disassembly Tool (Johnny Joint Tool)
The Johnny Joint tool is a tool that makes the rebuild process so much easier, which is designed specifically for pressing in and pressing out the components of your Johnny Joint. It’s made up of several parts, which you’ll see in the RockJock Johnny Joint tool below.
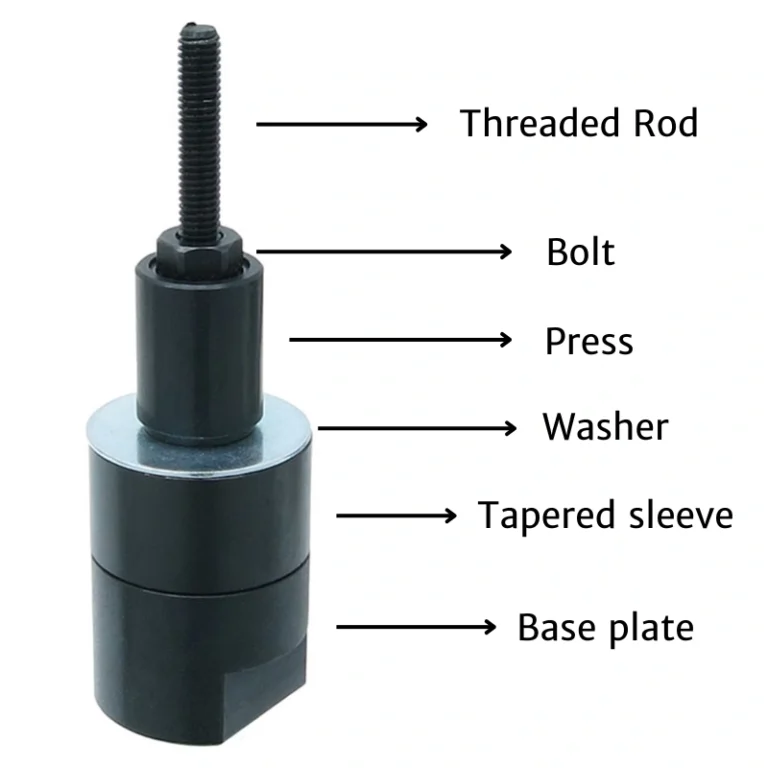
These parts include:
- Threaded Rod: Used to apply controlled pressure and hold everything in place.
- Bolt: Secures the tool in place and ensures everything is properly aligned.
- Press: Helps press out the old bushings and press in the new ones.
- Washer
- Tapered Sleeve: Assists in the removal and installation of the ball by evenly applying pressure.
- Base Plate: Provides stability and keeps the tool in place while you work.
With all these tools in hand, you’re ready to start the Johnny Joint rebuild process. It may sound like a lot, but once you get the hang of it, the whole thing is pretty straightforward—and you’ll save a ton of money compared to taking it to a shop!
Steps to Rebuild a Johnny Joint
1. Secure the Johnny Joint Tool in the Bench Vise
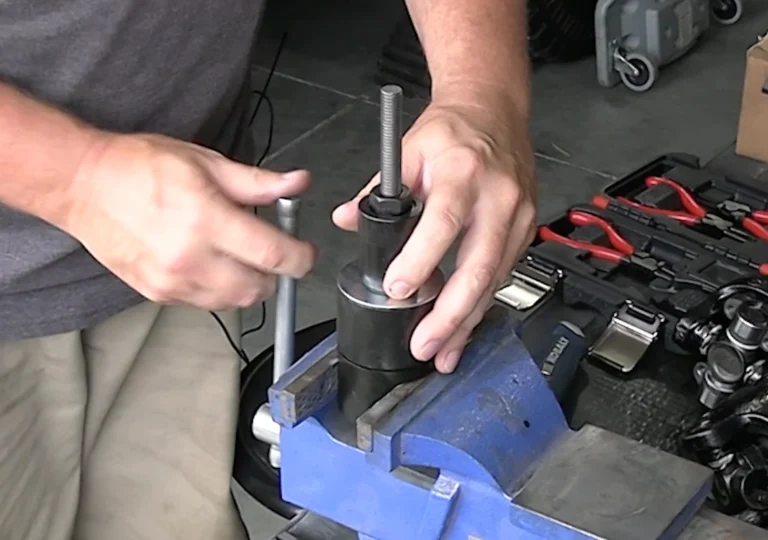
Start by securely attaching the Johnny Joint assembly/disassembly tool to your bench vise. This will provide a stable foundation to ensure that your work area is steady while you rebuild the Johnny Joint.
2. Place and Tighten the Johnny Joint
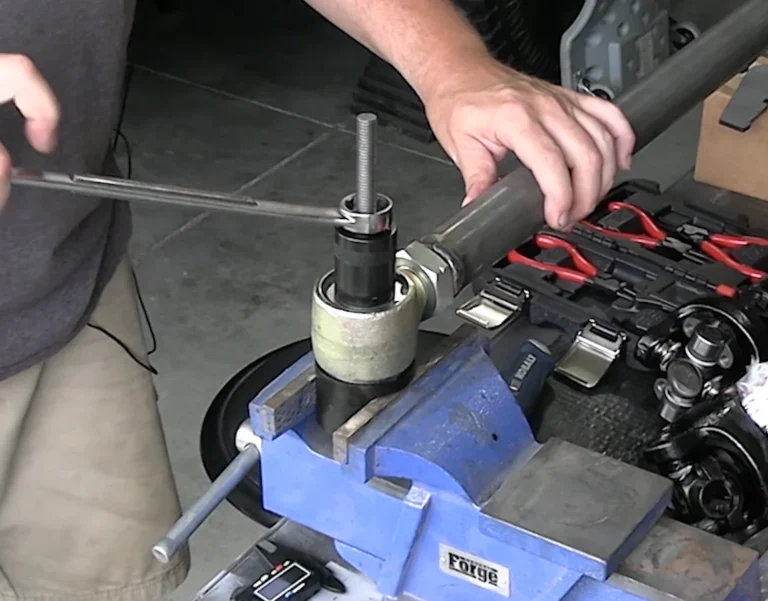
Next, position the Johnny Joint on the base plate. Use the press mechanism of the Johnny Joint tool to tighten the top bolt, securing the joint in place for the upcoming steps.
3. Remove the Snap Ring
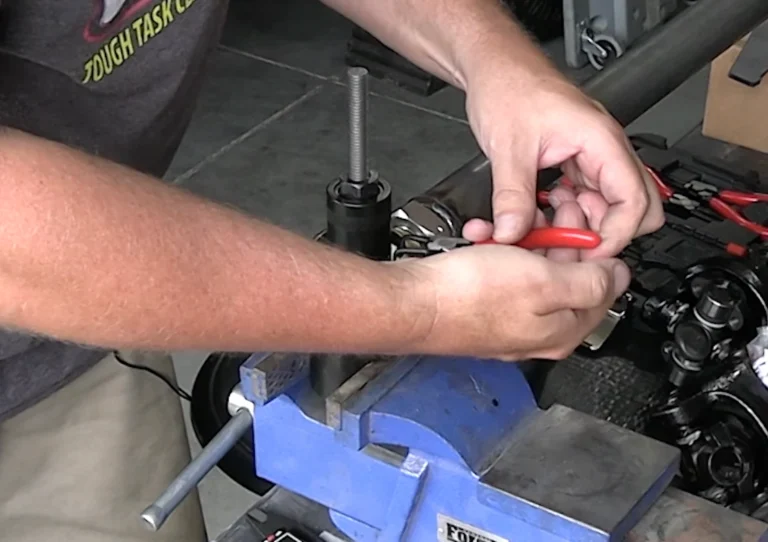
Using snap ring pliers, carefully remove the snap ring from the Johnny Joint. This is an essential step before disassembling the components.
4. Remove the Washer
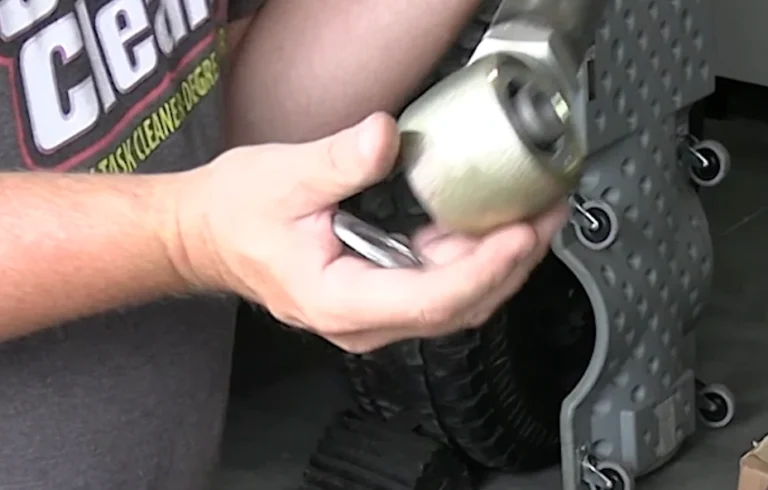
Once the snap ring is removed, take out the washer.
5. Position the Tapered Sleeve
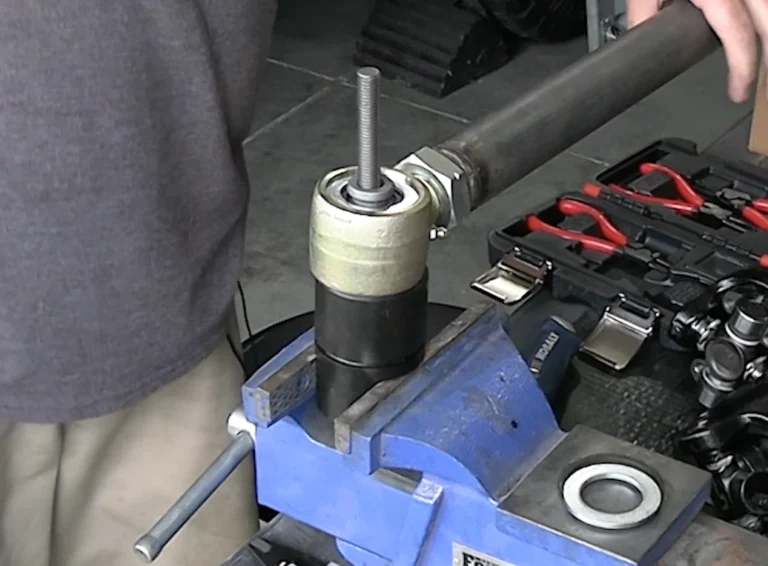
Now, place the tapered sleeve of the Johnny Joint tool onto the base plate, ensuring that the smaller diameter end is facing upward.
6. Align the Johnny Joint with the Sleeve
With the side of the Johnny Joint that has had the snap ring and washer removed facing down, align it carefully with the tapered sleeve. Ensure that it is properly centered and secured in place.
7. Press the Bushing Down into the Tapered Sleeve
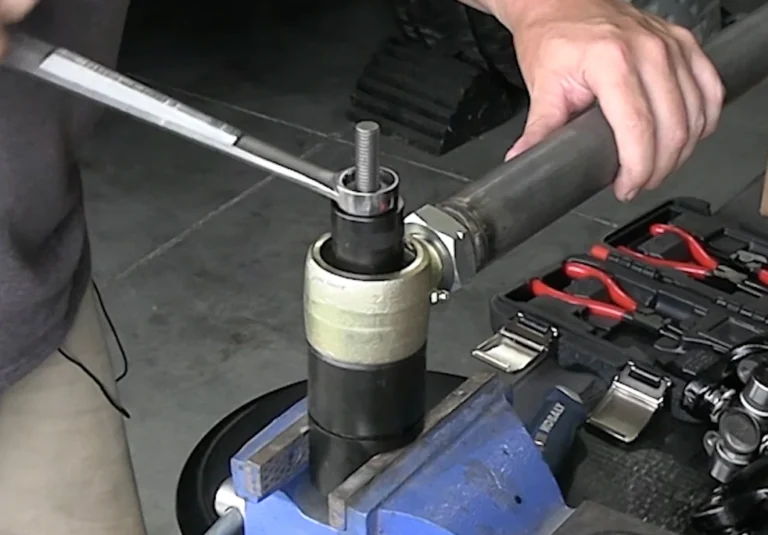
Using the press component of the Johnny Joint Tool, tighten the top bolt to push the bushing downward into the tapered sleeve, effectively pressing it out.
8. Remove the Outer Housing of the Johnny Joint
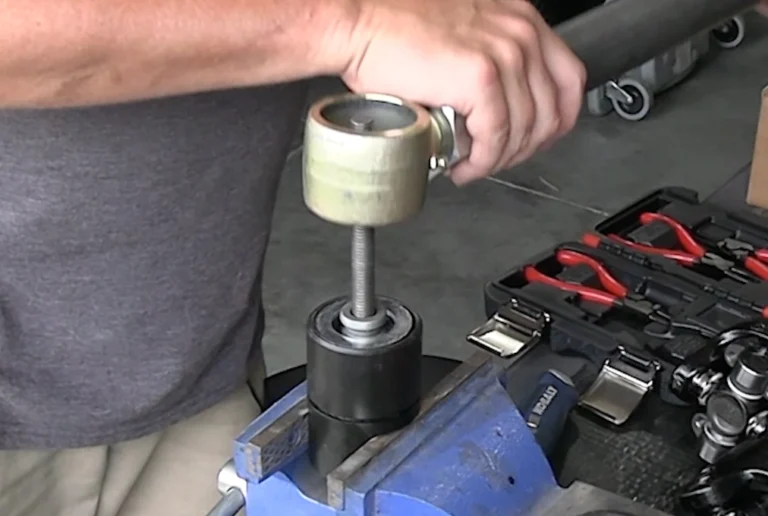
Once the bushing has been pressed out, remove the outer housing of the Johnny Joint. You’ll be left with the internal parts, ready for replacement.
9. Remove the Tapered Sleeve
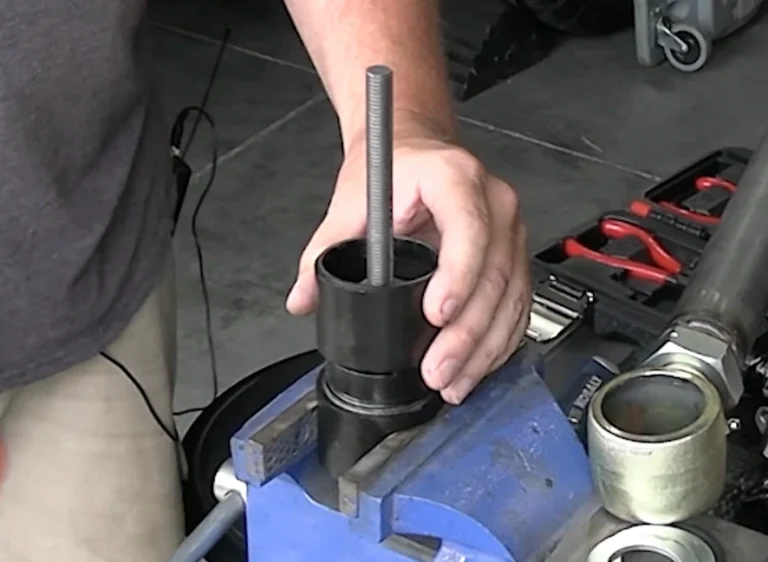
After removing the outer housing, take the tapered sleeve off the tool.
10. Take Out the Bushing and Ball
Now, remove the bushing and the ball from the Johnny Joint assembly.
11. Replace with the New Johnny Joint Rebuild Kit
Use a Johnny Joint rebuild kit for the replacement. The kit includes a ball, two bushings, two washers, and a snap ring—everything you need to complete the rebuild.
12. Grease the Ball
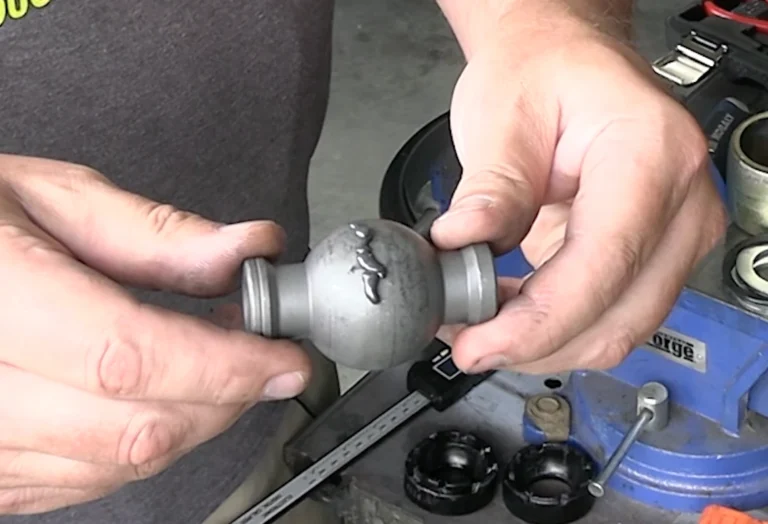
Before inserting the new ball, apply a small amount of grease to it.
13. Align the Ball and Bushings
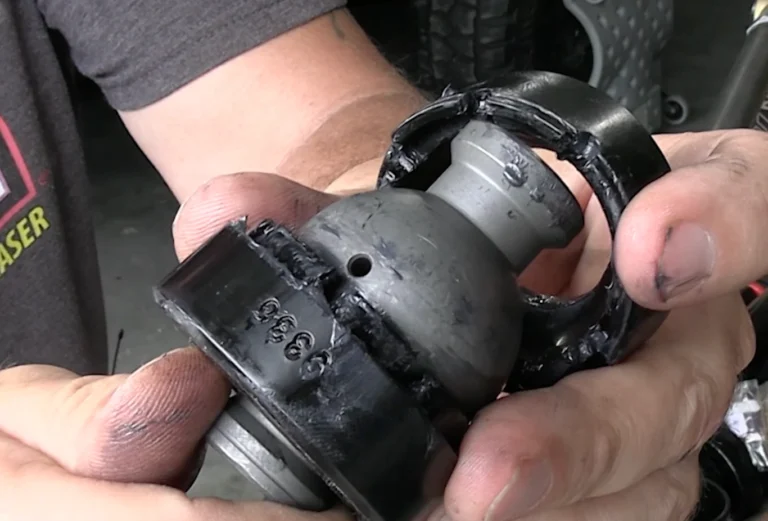
Insert the ball into the two bushings, ensuring that the holes in the ball align with one of these holes in the bushings. This alignment will help grease flow into the joints properly.
14. Insert the Assembly into the Sleeve
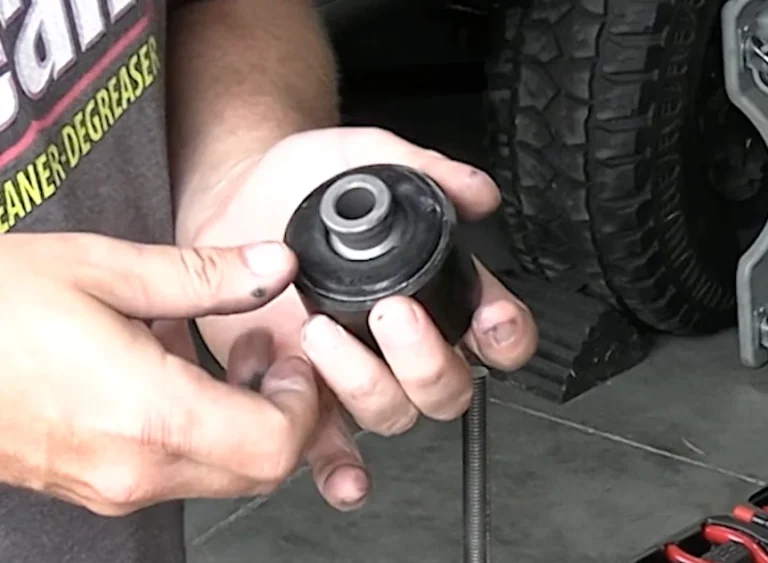
Now, insert the ball and bushings into the tapered sleeve from the larger end.
15. Place the Outer Housing
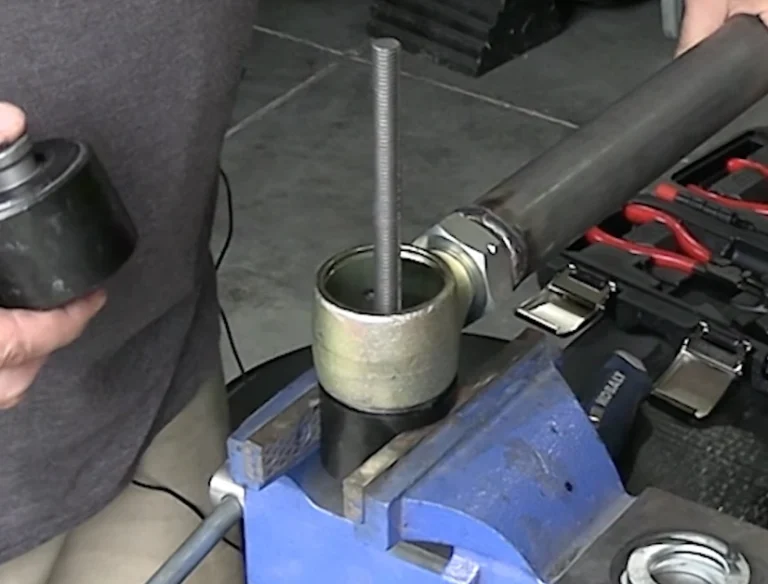
Position the outer housing of the Johnny Joint onto the base plate.
16. Insert the Washer
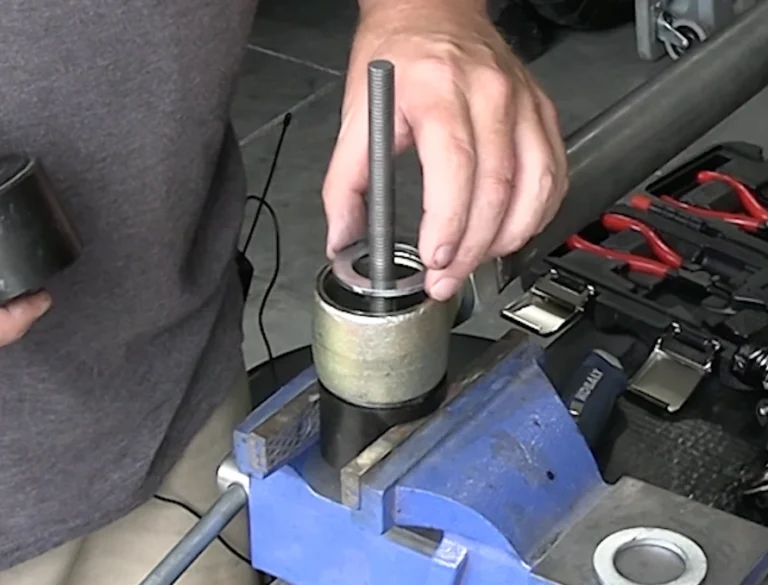
Place a washer into the housing, making sure that the sharp edge faces downward. This ensures that the sharp edge faces outward when the assembly is fully compressed.
17. Install the Tapered Sleeve and Washer
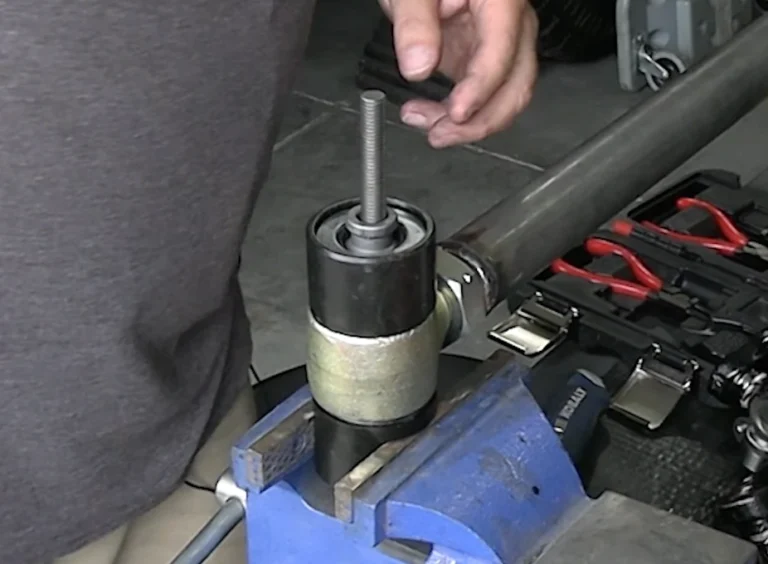
Next, place the tapered sleeve (with the ball and bushings inside) with the small end facing downward. Add another washer, again making sure the sharp edge faces outward.
18. Press the Bushing Into the Housing
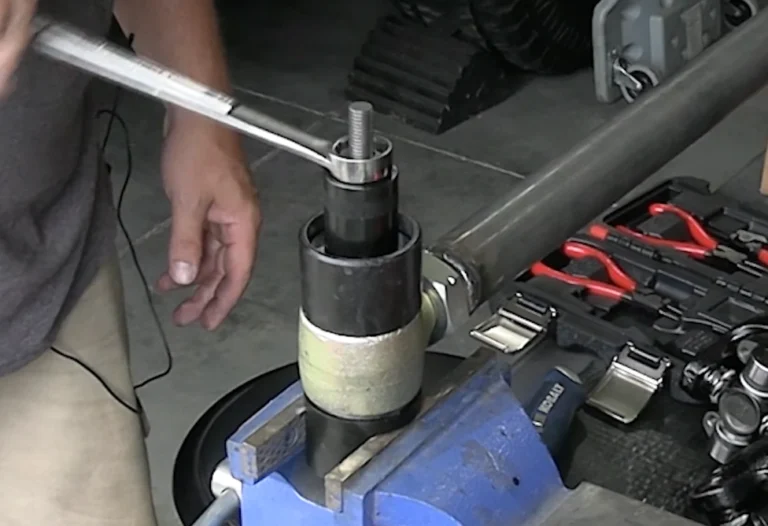
Using the press, tighten the top bolt to press the ball and bushing into the housing. This step ensures that all components are properly seated and secure inside the housing.
19. Install the Snap Ring
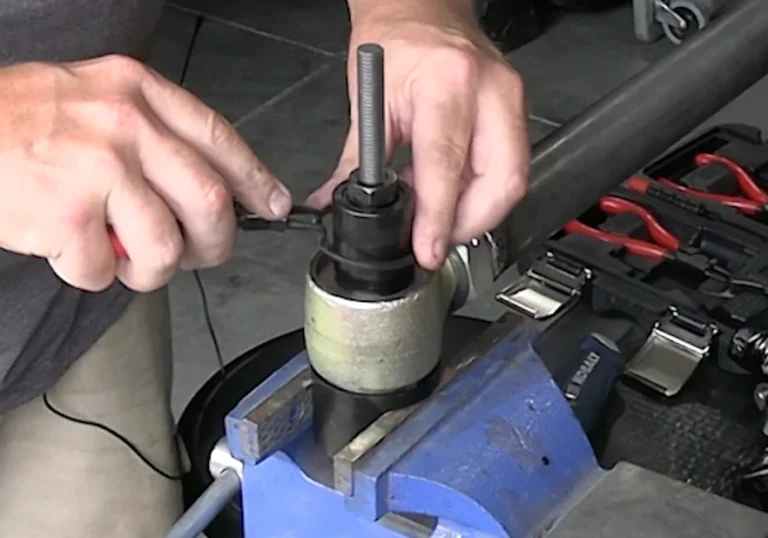
Finally, use the snap ring pliers to install the snap ring. This secures everything in place, and your Johnny Joint rebuild is complete and ready to be reinstalled on your vehicle.
Final Notes
Rebuilding a Johnny Joint is a simple yet cost-effective solution for off-road enthusiasts looking to maintain their vehicle’s suspension system. With just a few tools and a rebuild kit, you can restore the joint’s performance, save money on labor costs, and ensure smoother rides during aggressive off-roading.
Disclaimer: All the demonstration images for the 19 steps in this guide are screenshots taken from a video by Shockwave Outdoors.


