When working with rod ends, one parameter often gets overlooked: torque. It defines how much effort it takes to rotate the spherical ball in the housing—and that directly impacts load capacity, wear life, and handling precision. In this guide, we’ll explain what rod ends torque really is, break down the three torque classes (F1, F2, F3), show how torque is measured and adjusted, and discuss why it changes over time in real-world use.
What Exactly Is the Rotational Torque of a Rod End?
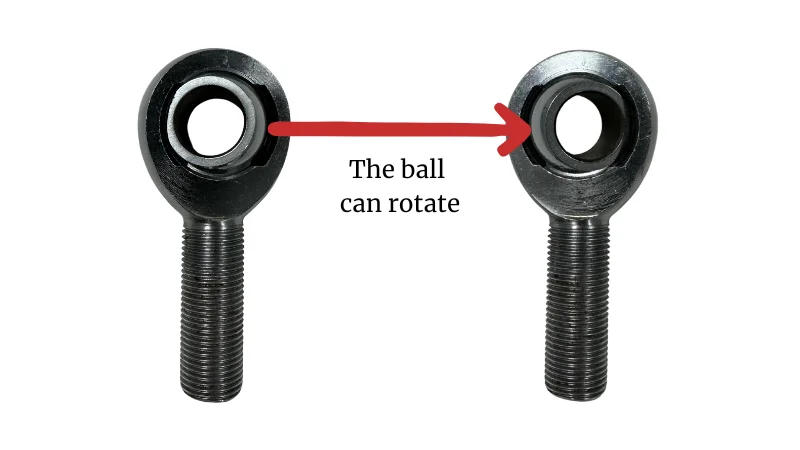
At its core, rod end torque—also called breakaway or starting torque—is the force needed to make the ball move inside its spherical seat. The ball must pivot smoothly while being firmly held by the housing, and that resistance is what we measure.
Why does it matter?
Because torque determines how a rod end performs:
- High torque joints resist movement, keeping alignment under load but making adjustment harder.
- Low torque joints move freely, improving responsiveness but wearing faster.
Factory torque is set by preload between ball and raceway, material choices (steel vs. PTFE liners), and lubrication. Once defined, the torque class (F1, F2, or F3) gives engineers a clear reference for selection.
Think of it as the “feel” of the joint: some are intentionally stiff, others rotate with ease. The right choice depends on the application—racing suspensions may need stability, while automation prefers smooth motion.
Three Common Torque Levels in Rod Ends
If you’ve ever tried to rotate the ball inside a rod end with your bare hands, you may have noticed that sometimes it feels locked tight, and other times it spins freely. That difference isn’t random—it’s tied to the torque class the part belongs to. Most rod ends are grouped into three practical levels: F1, F2, and F3. Each level represents a different range of starting torque (or breakaway torque), and each has its own place in the world of mechanical design.
F1 Class Torque (6–24 lbf)
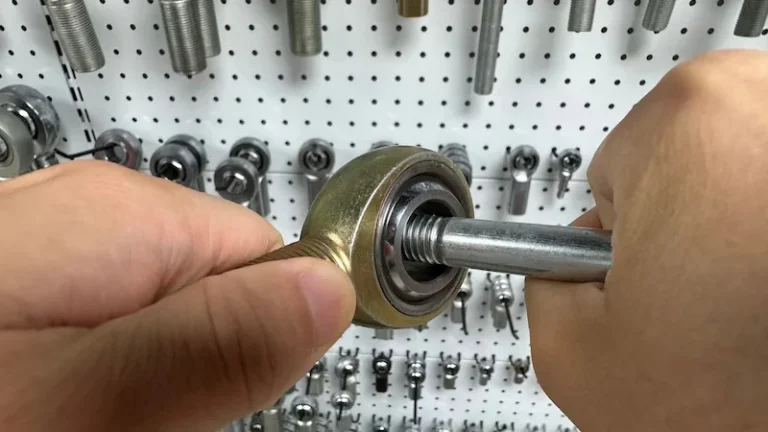
F1 is the heavyweight of the group. With a starting torque between 6 and 24 pounds, these rod ends are extremely stiff. In fact, you usually can’t rotate the ball by hand; you’ll need a lever or bar for assistance.
Why make a joint this tight?
Because F1 torque is ideal for high-load and high-stress environments. Think performance racing cars that need maximum control of suspension geometry, or heavy-duty machinery where any slop or looseness could cause catastrophic wear. The higher resistance helps maintain alignment under extreme conditions, even if it sacrifices some ease of adjustment.
In short: F1 torque equals stability and durability under load, but don’t expect effortless movement.
F2 Class Torque (2–6 lbf)
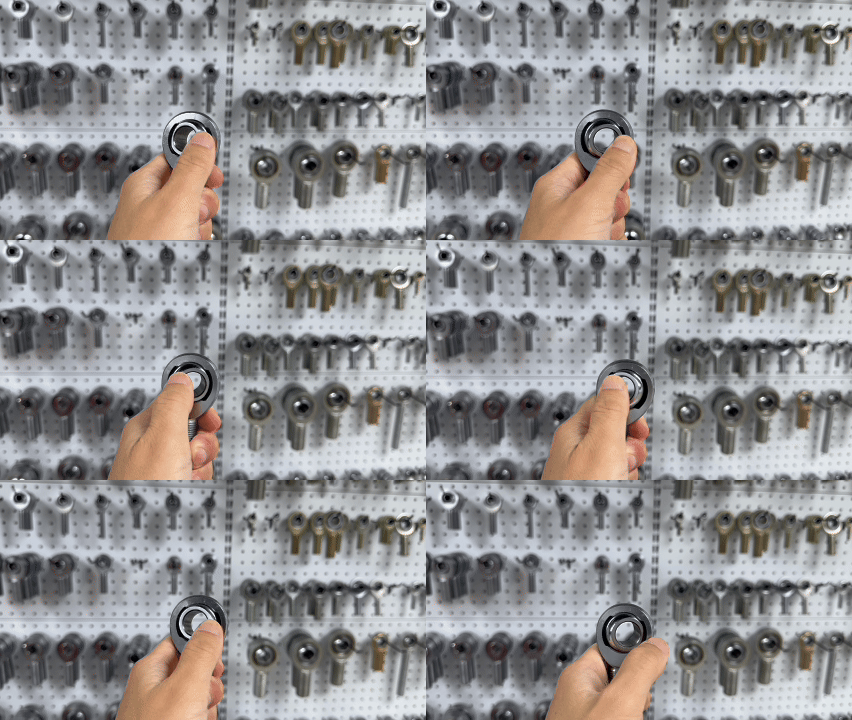
F2 sits comfortably in the middle. At around 2 to 6 pounds of starting torque, you can rotate the ball by hand—but you’ll definitely feel resistance. This balance makes F2 rod ends one of the most widely used categories in both light-duty machinery and industrial setups.
Why? Because they strike the perfect compromise:
- Enough torque to stay stable under moderate loads.
- Low enough resistance for easier handling and quicker adjustments.
If you’re working in general automation, light equipment, or moderate mechanical systems, F2 torque often hits the sweet spot.
F3 Class Torque (0–1 lbf)
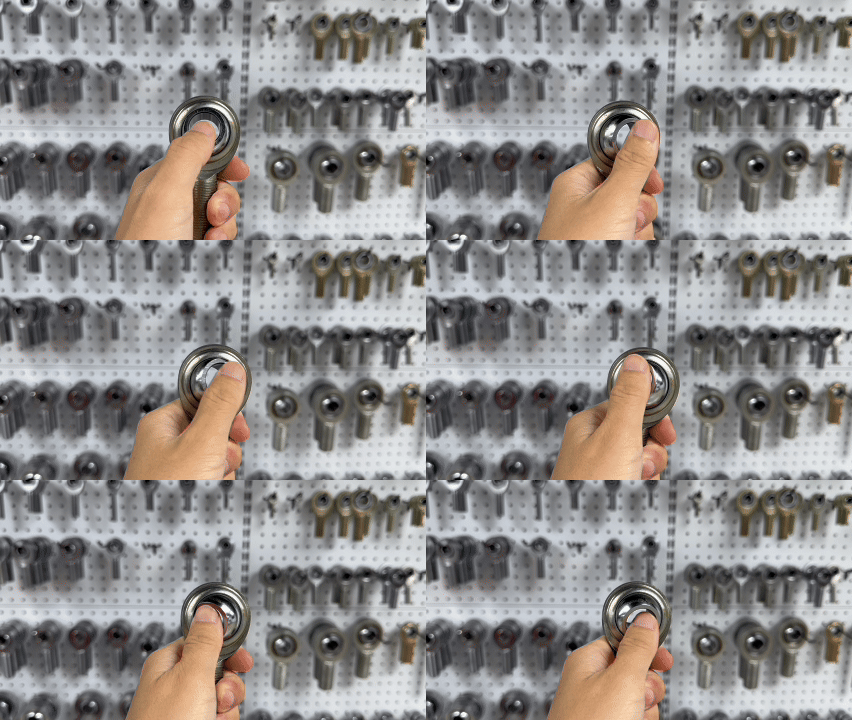
At the opposite end of the spectrum is F3. With almost no resistance (0 to 1 pound), these rod ends spin effortlessly. You can rotate the ball with a single finger, and it feels almost frictionless.
That doesn’t make them weak—it just means they’re designed for sensitivity and responsiveness rather than brute strength. Applications include lightweight devices, precision instruments, and situations where you need the joint to move freely with minimal effort.
Of course, the tradeoff is durability under heavy stress. An F3 rod end won’t last long if you throw it into a high-load racing suspension, but in its proper setting it’s unbeatable for smooth motion.
Quick Comparison of Torque Classes
| Torque Class | Starting Torque Range | How It Feels | Typical Applications |
|---|---|---|---|
| F1 | 6–24 lbf | Cannot be turned by hand; requires leverage | Modified cars, racing suspensions, heavy equipment |
| F2 | 2–6 lbf | Can be turned by hand with noticeable resistance | Light equipment, industrial machinery, automation systems |
| F3 | 0–1 lbf | Turns freely with almost no resistance | Precision instruments, lightweight devices, responsive mechanisms |
How to Measure Torque?
Here we use a spherical bearing with a torque testing fixture to show the principle. The same steps apply when testing rod ends.
Step 1 — Fix the setup
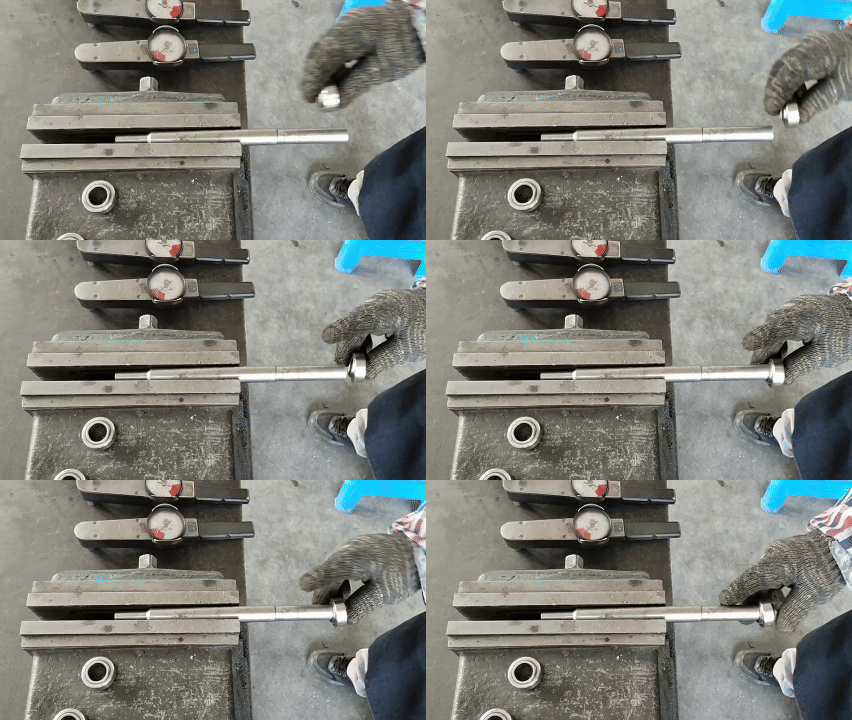
Clamp a steel rod in a vise and mount the bearing on it. This keeps everything steady.
Step 2 — Attach the fixture
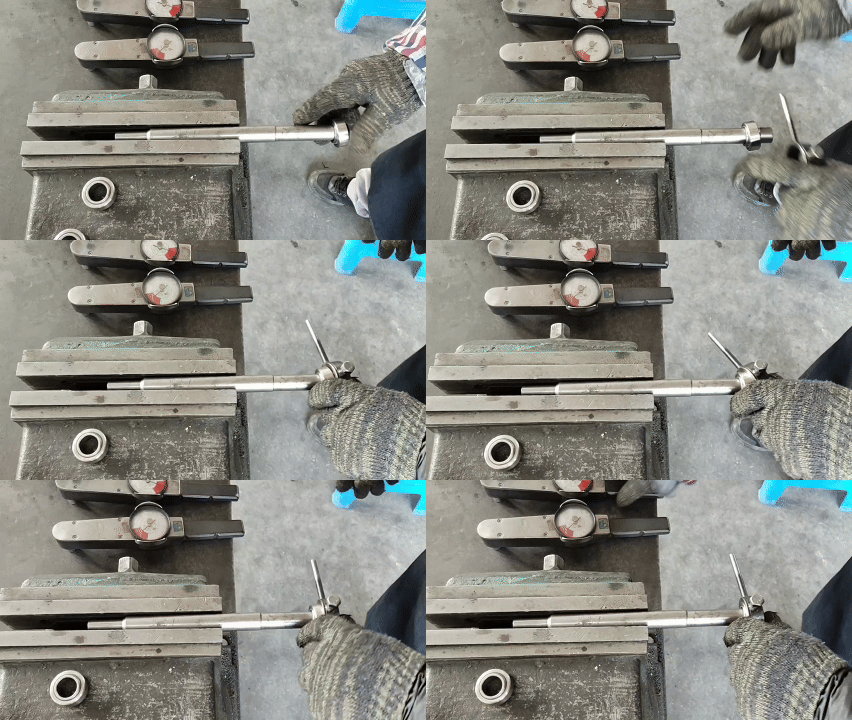
A torque testing fixture is placed on the bearing’s outer race. The fixture has a hex head that serves as the drive point.
Step 3 — Engage the torque gauge
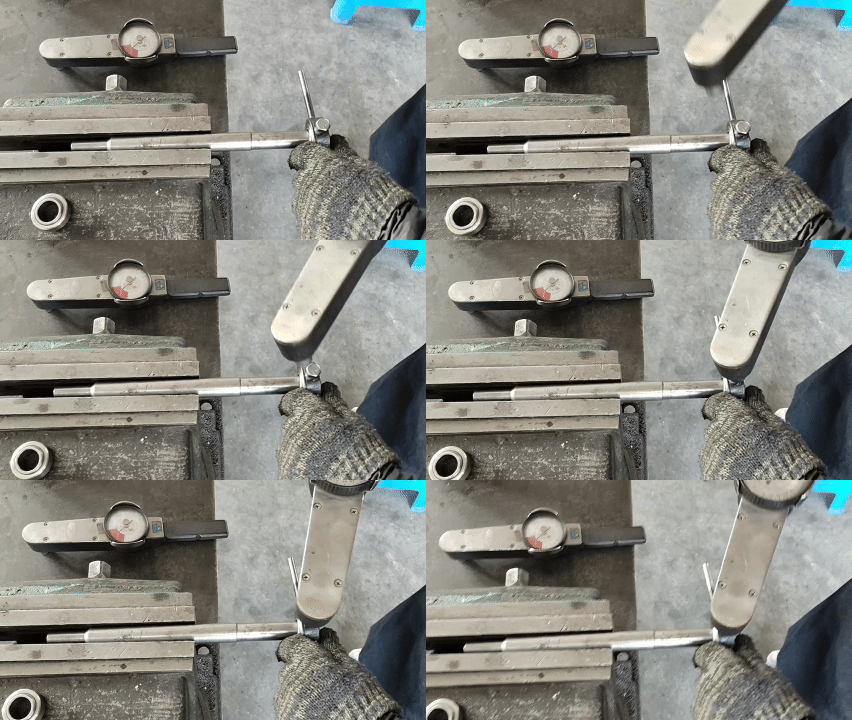
The dial torque gauge has a hex socket. Slide it onto the fixture’s hex head until it fits snugly.
Step 4 — Apply torque
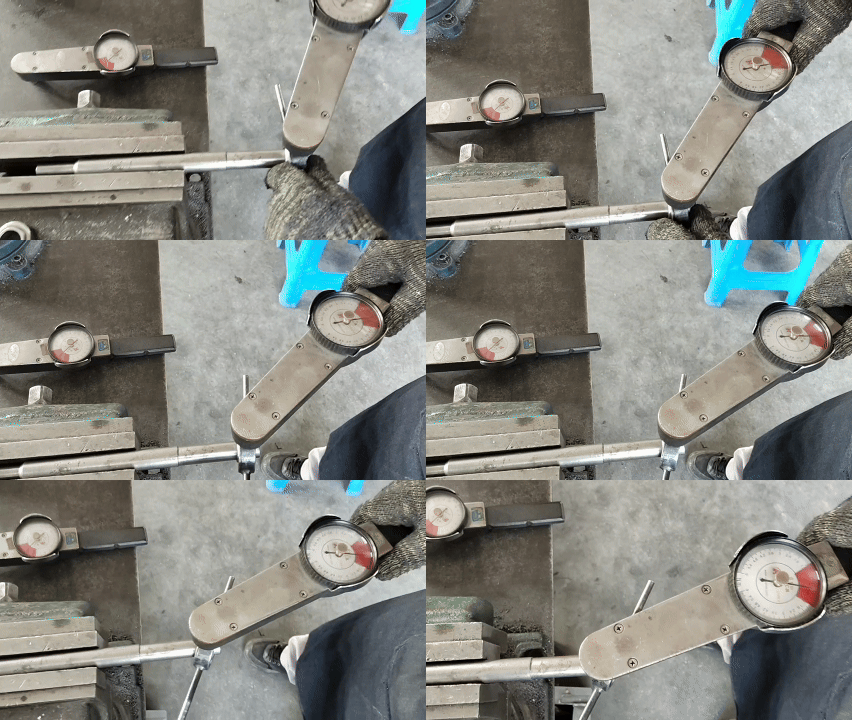

Turn the gauge handle smoothly. Keep the movement steady and avoid sudden jerks.
Step 5 — Read the value
When the ball first begins to rotate, note the reading. This is the breakaway torque. Compare it to F1, F2, or F3 ranges.
How to Adjust Torque Levels?
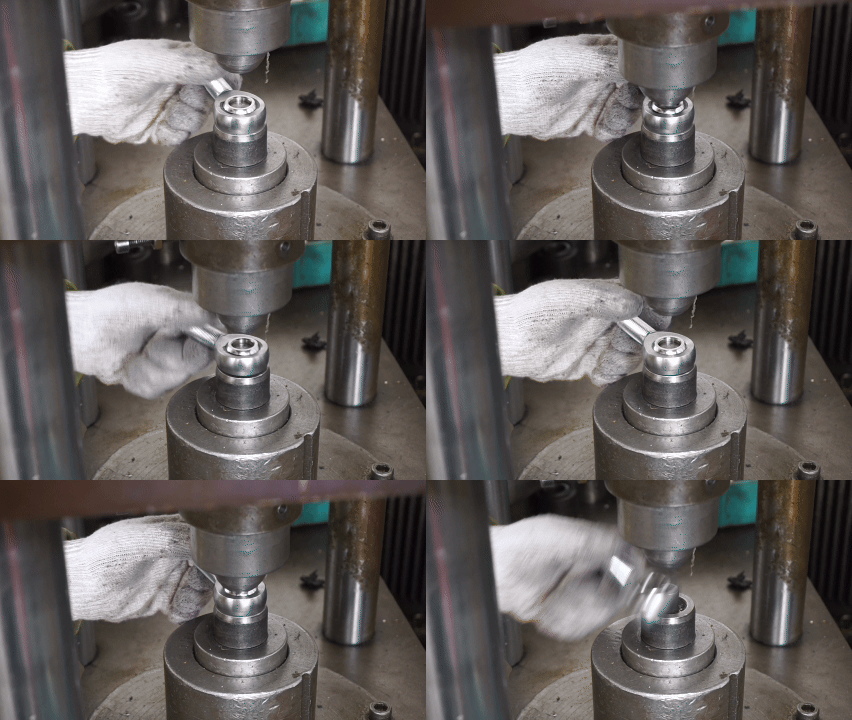
At the factory, rod ends are set to their torque class—F1, F2, or F3—using a special press machine. The process applies controlled pressure to the outer ring of the joint, increasing or reducing preload on the ball until the torque matches the required range.
This adjustment ensures that every rod end shipped meets its specified torque level, giving buyers a consistent F1, F2, or F3 performance right out of the box.
Will Torque Levels Change Over Time?
Let’s be honest: Yes!
No matter how carefully rod ends are made, their torque doesn’t stay the same forever. Over time, things wear in, grease dries out, and loads take their toll. The result? The rod ends torque you felt when the part was new can shift—sometimes a little, sometimes a lot.
Lubrication Fades
Grease and coatings don’t last forever. Heat, dust, or moisture can thin them out or make them dirty. When that happens, the ball doesn’t glide as smoothly, and you’ll notice the joint feels tighter. If lubrication runs out completely, friction can spike fast.
Surfaces Wear Down
With every movement, the ball and housing rub against each other. At first, they might even “loosen up” slightly as things polish in. But after long use, scratches, dents, or even light rust can appear. These small changes increase resistance and make the joint feel stiffer than it did when new.
Misalignment and Load
If the rod end isn’t lined up perfectly or the shaft bends under heavy load, the ball no longer moves on its smooth path. That uneven pressure creates extra drag. It’s a bit like driving with your wheels out of alignment—everything feels harder than it should.
Temperature Swings
Cold weather can make a joint feel sticky; high heat can thin the grease and change how the ball seats in the housing. In both cases, the torque won’t feel the same as it did at room temperature.
Preload Settles
Rod ends get their torque class (F1, F2, or F3) from how tightly the ball is set in the housing. Over time, that tightness can relax a little. An F1 rod end might still be “high torque,” but after long use it can feel closer to an F2.
Engineers often connect this change to preload behavior, which in some cases can be estimated through friction torque. NASA even outlines indirect methods of assessing preload via friction torque in its fastening standards.
Torque levels do change with use, but not like flipping a switch. It’s a slow drift caused by wear, lubrication, and real-world conditions. If torque accuracy is critical in your application, the best move is to check your rod ends regularly and replace them before the change becomes a problem.
Special Structure: Adjustable Combination Rod Ends
So far, we’ve looked at torque classes (F1, F2, F3) as if they’re locked in from the factory—and for most rod ends, they are. But there’s one design that breaks the rule: the rebuildable rod end.
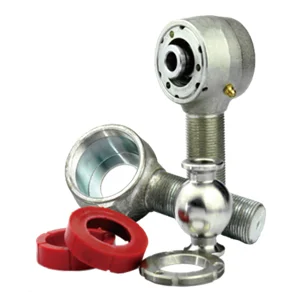
Instead of giving you a fixed torque level, this type lets you fine-tune resistance by tightening or loosening the outer housing. With the right tool, you can add preload for a stiffer feel (similar to F1) or back it off for a smoother, freer motion (more like F3). In other words, one part can cover the full torque range.
Why is that useful?
- Flexibility in the field: Racers, builders, and mechanics can adjust torque on the spot instead of swapping out parts.
- Prototyping: Engineers can test different torque settings during development without ordering multiple samples.
- Extended service life: As torque naturally drifts over time, you can re-tighten or loosen the joint to bring it back into range.
The downside?
Adjustable rod ends are usually more expensive and require careful handling. Crank them down too far, and you’ll wear the joint prematurely. Run them too loose, and you risk losing stability. But for projects where torque really matters, having that adjustment dial is a huge advantage. This balance between tightening and wear is similar to what’s seen in bolted joint design, where torque plays a key role in safety and longevity. For reference, see NASA’s fastener torque design criteria.
Conclusion
Torque might not be the flashiest spec on a datasheet, but it’s one of the most important. Knowing how rod ends torque works—and how it changes across F1, F2, and F3—helps you pick the right part for your build, whether you’re sourcing for industrial machinery or tuning a racing suspension. And if you ever need more flexibility, adjustable designs can give you control over torque instead of leaving it to the factory.
Bottom line: don’t overlook torque. The right balance of resistance and freedom is what makes a rod end reliable, responsive, and long-lasting.
Torque is one key performance factor. For a full breakdown of all factors that impact heim joints, view our Wholesale Buyers’ Guide.


